
Evan Ruiz
Owner at - Techi ShowI am a professional laptop and computer troubleshooter, tech editor who loves to talk about technology and software. My passion is electronics devices. Follow me...Read more
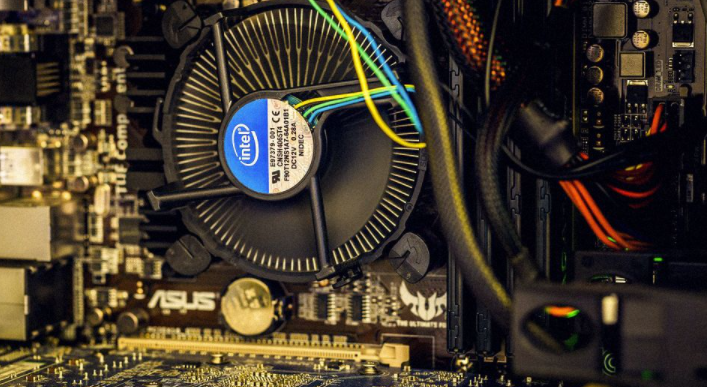
We use our computers to handle thousands of tasks in a day. From video streams, video games, work, and much more, handling all these tasks doesn’t come without a side effect; heat. Our computers produce a huge amount of heat daily; our CPU would fry if it weren’t for their fans.
Now imagine you wake up one morning, and your computer fan is making rattling noise; surely this is cause for alarm. Does it mean the fan is bad? We will look into these and more in this article. Just read it carefully, so you don’t miss any important information.
When Should You Be Concerned About Computer Fan Making Rattling Noise
The fans in desktops, laptops, and other computer devices are designed to generate more airflow depending on the task. This is why when handling light tasks like typing and internet surfing, the fan is barely noticeable, but if you’re playing heavy games, you will notice it gets louder.
A heavier whirring sound due to increased airflow is not bad, so long as it usually occurs during high-performance tasks. It just means the fan senses the CPU is going at full capacity and wants to keep it at optimum performance temperature. What is considered unusual is;
- Rattling sound as a fan is moving.
- The computer’s fan is going at full capacity even when the device is idle.
- You can barely hear the fan, and your computer is very hot.
Things That Could Lead to Computer Fan Damage
When your computer fan is making a rattling noise, several things could be causing it. Let’s consider some of them below.
- Hard falls in laptops can make certain components get loose and get stuck in your fan.
- Little debris around the fan intake area can get sucked in and also damage the fan. Desktops generally don’t have this problem because the CPU is kept upright.
- Aftermarket parts gotten from generic off-brand sites or shops are often inferior. If you ever need to work on your computer, ensure using a trustworthy manufacturer.
- Running software above the capability of your computer for long periods will lead to CPU overheating. Your computer fan will try to balance this out by going full throttle for long periods, too; this is not good for the internal components.
What to Do With a Computer Fan Making Rattling Noise?

Clean the fan component
For desktop
If you use a desktop, you will be able to see the fan section from the exterior of the pc; you need a suitable screwdriver to open this section. After taking off the cover, use a cotton bud to get to tighter areas and a rag where there is more space. You can also use an air blower to remove dust.
Locate any other component in the CPU with a fan, such as the graphic card, and clean them.
For laptop
It’s easier to notice weird noises in laptops because they’re smaller; most times, you can feel the vibration just by touching it. A simple fan cleanup is the first step; open up your laptop and locate the fan. They’re quite smaller than a desktop’s own, so quick bursts of compressed air from a blower or any other tool might prove to be efficient.
Confirm Your Computer Is Getting Adequate Air
There might be a blockage at the vents where airflow passes through. This could create a mini vacuum where air passes but slowly; in events like this, your fan could make unusual noises.
If you use a laptop, ensure it is placed on a flat surface that allows for maximum airflow. An elevated surface that leaves the fan outlet exposed is even better.
Tighten the Screws Holding the Fan Blade
There is a screw or screws that hold your computer’s fan in place. If these screws loose, the fan will rattle on its axis while moving. Depending on the laptop or desktop, there might be a protective covering over the fan blade; loosen this to get access.
Thus, ensure to find out if your computer fan is working properly.
Are There Broken Parts or Screws in Your Computer?
If you use a laptop, chances are it might have fallen down at least once; this is a problem desktops don’t normally have because they are not moved around so much. Sometimes a rattling noise might be a loose screw that is caught in your fan while it’s working.
A good way to confirm if this is the problem is by turning off your laptop and shaking it. If you can hear something moving around, then you’ve found the culprit.
Troubleshoot for Overheating
Overheating occurs when the air generated by the fan cannot cool the CPU adequately. When this happens
For laptop
When your laptop is overheating, it feels extremely hot; you would notice this immediately if it’s on your lap. If it is on a table or any other surface, just place your hand near the exit vent, the air would be very hot.
Of course, when your device is overheating, computation processing will slow down; this would be immediately noticeable. If you have fan management software, it should tell you if the fan is running at optimum capacity.
For Desktops
An overheating desktop slows down; you suddenly notice it’s taking a lot of time to load programs. Place your hand near the fan exit vent. Is it hot?
It could also be a ventilation problem. It’s easy to find a temporary solution for desktops, just put on a fan and face it toward the air intake vents; if your pc suddenly gets faster, you would know it was the fan all along.
Run Software’s Within Your Computer’s Capability
Computer fans are designed to supply just the right amount of airflow according to the computer’s temperature. You might have noticed your fan is at a steady light hum when running light tasks, but it gets aggressive when running high-performance tasks like gaming or video editing.
This regulation is very beneficial to the computer. You don’t want a fan running at full capacity every time; this can heat up the circuit board and damage some components in the long run.
When you run the software higher than the capability of your computer, the CPU struggles to keep up; at this point; you will encounter high internal temperatures. It also means you have a fan running at high speeds for long periods. Eventually, the fan loses efficiency and can no longer cool the computer adequately.
Replace Your Fan
If you still have problems after trying all other options, your best bet is to replace your fan. Just be sure it’s actually an underlying problem and not just a loud fan. High-performance fans found on a computer like gaming laptops are very loud naturally. This is because they’re designed to bring in an extreme amount of air to meet up with the high-performance programs being handled.
Conversely, your computer naturally has a silent fan but, now you realize the computer fan making grinding noise. This can be because of overloading on the computer.
Get a replacement fan from a trusted vendor, and avoid buying off-brand products; they are well known for being unreliable. You can easily replace it yourself if you know your way around computer hardware; if not, go to a computer technician and change it. It will be a lot easier since you’re only paying for their service.
Your computer’s warranty will likely cover the replacement of problems like this so long as you have not voided it. It will be best to try going through the manufacturers first.
How to Quickly Replace Your Computer Fan

Replace your fan for desktops
Replacing your pc fan doesn’t have to be a big deal; their bigger CPUs are typically easier to navigate through. When performing this replacement, ensure you wear an anti-static bracelet; you can also use an anti-static mat. This video also shows the proper way to open up your desktop’s CPU
- Step 1: To avoid being electrocuted, you need to cut your computer off from any power supply
- Step 2: Remove the screws located on the backside of the computer housing unit. We only need access to the back panel so remove the screws that hold that down.
- Step 3: Once the screws holding the panel are out, remove the panel to gain access to the internal components. Sometimes the fan is mounted on the panel itself; carefully unplug the cable before removing the panel completely, or you might cut it.
- Step 4: If you look at the front panel, you will find three grey connectors, push to unlatch them. Once this is done, bring out the fan housing unit.
- Step 5: Using a screwdriver, remove the screws holding the exterior covering of the fan housing unit in place.
- Step 6: Once you’ve gained access to the fan’s internal system, remove the fan from the fan housing unit, be sure also to disconnect the fan from the power cable.
- Step 7: Connect the power cable to your replacement fan.
- Step 8: Insert the replacement fan into the fan housing unit and just reverse these steps to set up your CPU once more. There you have it; you’ve successfully replaced your fan.
Replace Your Fan for Laptops
Unlike desktops, where the CPU housing layout is mostly the same, and differences between manufacturers are minimal. A laptop’s internal layout differs according to product and the model, not to worry though the principle is mostly the same. Using your intuition, you just have to find where the parts in this guide are on your laptop or consult the service guide.
This video also guides you to properly open up your laptop.
- Step 1: Shut down the laptop and ensure the power cable is not connected to it. Remove the battery also.
- Step 2: Flip the laptop over and locate the screws that hold the main panel in place. Most laptops have their hard disk in separate panels, so you access them easily; that is not the panel we want to open.
- Step 3: Depending on the laptop model, you might need to remove the keyboard to access the fan. To do this, simply remove the screws that hold it in place. Be sure to carefully disconnect the data ribbon cable attached to the keyboard before pulling it out, or you might cut it.
- Step 4: Once that is done, unscrew the fan housing unit from the laptop; it is usually a very small box. Carefully unplug the power cable connected to it, so it is not damaged.
- Step 5: Put in your replacement fan and seal up the laptop by reversing the steps.
That’s it, you’ve successfully replaced your laptop fan, and your system is now ready for use.
Conclusion
Your computer fan making a rattling noise doesn’t have to be a death sentence. By following these troubleshooting steps above, you should figure out what is wrong with it. A simple fan replacement should solve the problem if none of the options work.
I am a professional laptop and computer troubleshooter, tech editor who loves to talk about technology and software. My passion is electronics devices. Follow me on social media.
More Posts