
Evan Ruiz
Owner at - Techi ShowI am a professional laptop and computer troubleshooter, tech editor who loves to talk about technology and software. My passion is electronics devices. Follow me...Read more
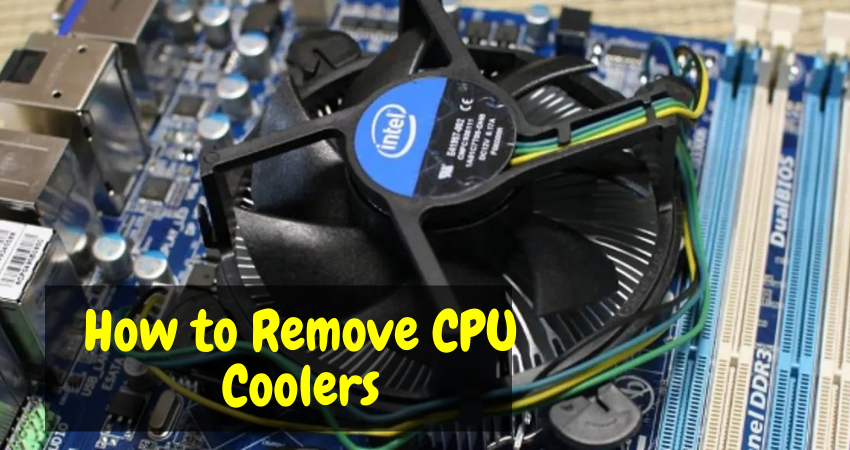
Have you been suffer overheating due to poor cooler in your CPU? You might feel the need for a replace but you don’t know how to remove CPU coolers and replace the old one with a new. No issue, you have stopped the right place for the right solution.
CPU coolers come in two different locking styles: retention clips and springs-screws. So, to remove a CPU cooler from a PC, you need first to determine the type of locking the cooler has. Then, unlock the locks and carefully take out the cooler.
You will find the steps on removing a CPU cooler as you read on. Also, we have included the lifespan of a cooler so you can have an estimate of when to replace your PC’s CPU cooler. More so, water coolers could be a good idea for your CPU. Read on to find out.
Is It Easy to Remove a CPU Cooler?
For a professional, with the availability of the right tool, it might not be a hard task to remove a CPU cooler. Removing a CPU cooler might be problematic for someone who doesn’t know his way around a laptop. They might end up breaking other components in the PC. However, rating how difficult or easy it is to remove a CPU cooler depends on the type of the cooler.

There are different types of CPU coolers aside from the locking style. There is the liquid CPU cooler and the fan CPU cooler. For the liquid CPU cooler, it might get harder, even for professionals. This is because a little leakage might be the end of the PC, as liquids don’t sit well with electrical devices.
The fan CPU cooler is easier to remove or even fix. It doesn’t give you worries over leakage. However, the problem you might encounter is that an unprofessional removal might affect the CPU. It might even escalate to the motherboard. So, we advise that no matter how easy the removal process looks, take the PC to a professional to do a clean job.
Can You Install a CPU Cooler Without Removing the Motherboard?
You can install a CPU cooler without removing the motherboard. But it depends on the case of your PC. It also depends on the style of the CPU cooler.
Some CPU coolers will require you to lock it behind the motherboard, and that way, you will remove the motherboard. But, for a CPU cooler that you just have to slot in the lock and connect, you won’t have a reason to remove the motherboard.
How to Remove CPU Coolers
knowing how to remove CPU coolers is important if you tend to remove or replace them. Removing a CPU cooler is different for each type of CPU lock mechanism. So, we will take you through the steps for each CPU type.
For CPU coolers with spring-screws
Shutdown the computer
Generally, it is important to shut down your computer before you take action on any of its interior components. It is actually for your benefit, as you will avoid shocks from other parts. Also, if the computer is on while you are opening it, there is a high tendency for a component to burn.
More so, when you power on the computer, the CPU is too, and the cooler doesn’t work with a manual command. So, the cooler will still function, and acting on it that way is not safe. So, shut down your computer before any further step.
Remove the cover of the cooler
Removing the cover or whatever is in front of the cooler is important for you to see what you are to work on. You don’t want to work blindly and damage other components. So, the safe option is to make the CPU cooler visible by taking off the cover.
Heat the thermal paste
The thermal paste holds the cooler to the processor. On the other hand, you can easily remove it for further adjustments.. When the paste is cold, it gets hard, and the cooler becomes challenging to remove. So the easy way to make the paste soft is by heating it.
Since it is not advisable to take fire close to the computer, running the computer for about 20 to 30min will produce enough heat to soften the paste. This means, before turning off the computer to start the cooler removal process, use the laptop for a while.
Unscrew the cooler of the CPU
Some CPU holds their cooler with screws. Here, all you need to do is get a screwdriver that matches the screw and loosen the screws. Repeat this for all the screws, and then take off the cooler.
Unfasten the cooler
After unscrewing the cooler from the CPU or heating the thermal paste to release the cooler, you need to disengage it from the motherboard. Mostly, the cooler is connected to the motherboard with either two, three, or four-pin cables. Trace the cable from the cooler to the connection point, then unplug it. The pin connection requires some technicalities to disconnect it, but it’s not something you cannot handle.
Unclip the cooler from the processor
Aside from the cable that connects the cooler to the motherboard, there is a clip connecting the cooler to the processor. Locate the clip and unclip the cooler from the processor. To do this, press the clip down and release the cooler. Then, twist the cooler clockwise and anticlockwise and release the heatsink seal from the CPU lid.
When you have done this, take the cooler off carefully. You have successfully removed your spring-screw CPU cooler. Watch this video to learn more:
For CPU coolers with retention brackets
Shut down your computer and open it
Before opening your computer, make sure you shut down the computer and unplug the cable from the power outlet. Then, open the computer and locate the CPU and the cooler.
Disconnect all connected cables
The cooler has a cable connection to the CPU and the motherboard, which makes it work when you turn on the computer. Also, it is connected to the RBG through a cable, which you should also disconnect. Disconnecting these cables is easy.
Make sure you don’t just pull cables to avoid damaging them. Locate the connection point, then unplug and unclip whatever needs unplugging or unclipping, but be gentle about it.
Unlock the CPU cooler from the retention mount
There is a lever at the side of the CPU cooler. If the lever is pointing to the side, it means it is locked and unlocked when it is facing upwards. So pull the lever upwards to unlock it from the mount.
Release the retention clip
Besides the heatsink, there is a clip holding the cooler to the socket of the motherboard mounting lug. Locate the clip and unclip it to release the CPU cooler.
Loosen the seal between the heatsink
For this step, twist the CPU cooler to the right and then in the opposite direction. This will loosen the seal in the middle of the heatsink and the lid of the CPU.
Remove the CPU cooler
This is where you finally remove the CPU cooler from the CPU. Here, you need to take the cooler off the CPU carefully. After doing this, the CPU will still stay installed.
To learn more, watch this video:
How Long Does a CPU Cooler Last?
A CPU cooler in the right and careful user’s hand will last for up to 3 to 5 years. A rattling CPU fan indicates faulty CPU cooler. You won’t need to change a CPU cooler for the time interval. However, the CPU cooler won’t be as effective as it was when you got it newly. After a while, leading to its estimated life span, it will start reducing its productivity.
Are Water Coolers Safe for PC?
A liquid CPU cooler is risky for people who cannot handle it, but it is worth it. If wrongly fixed, they can leak and damage other components in the computer. But, in the right hands, it is safe. The liquid cooler has proven to be more effective than the fan cooler.

The fan cooler can most times blow hot air when the computer is too hot, but the liquid cooler stays cool and keeps the computer the same way. Liquid CPU coolers also function effectively in sending out heat with the fan in its radiators. Also, liquid coolers come with a luxury look with their fancy back-light. Even the custom-loop water cooling tools are catchy to the eyes.
How to remove liquid CPU coolers
Shutdown the computer
Before further steps, turn off the computer and disconnect it from any power source. This is to keep yourself safe from electrical shocks and hot thermal pastes.
Disconnect the liquid cooler
Here, unplug the plugins that connect the liquid cooler to the CPU and the motherboard. Make sure not to drag the cable carelessly. Find the connection point and do a neat disconnection.
Unclip the retentions clips
Each side of the liquid cooler heatsink has retention clips. Press them down and unclip them carefully.
Loosen seal
Now, you can release the seal hold the heatsink and the lip of the CPU together. Twist the cooler clockwise and counter-clockwise to loosen the seal.
Take off the liquid CPU cooler
After removing the seal, you can take the cooler off the CPU. Remove the liquid CPU cooler gently and let the CPU stay.
Conclusion
CPU coolers are of two types and two locking mechanisms. They all have different procedures to remove them from the CPU. All of them require you to be careful not to damage the cooler itself or other computer components. So, to know how to remove CPU coolers from your computers, you need to know the type of cooler.
You also need to know the locking mechanism it has. A liquid CPU cooler is even harder to remove because of the leakage tendency. Then the air CPU cooler is a little straightforward, depending on the locking mechanism. But generally, you need to unclip the heatsink, unplug every connection, then remove the CPU cooler.
I am a professional laptop and computer troubleshooter, tech editor who loves to talk about technology and software. My passion is electronics devices. Follow me on social media.
More Posts