
Evan Ruiz
Owner at - Techi ShowI am a professional laptop and computer troubleshooter, tech editor who loves to talk about technology and software. My passion is electronics devices. Follow me...Read more
Want to change your CPU fan speed and thinking about using or resetting BIos? Long and complex Procedure indeed. what about thinking an alternative. Have you ever thought how to change CPU fan speed without BIOS! let’s try.
So, how to change CPU fan speed without bios? Well, you can use third-party software products like SpeedFan, etc. These software apps let you adjust the RPM of your laptop CPU fan without entering into the BIOS. Furthermore, you can even monitor your CPU temperature from these apps.
Therefore, without any more ado, let’s learn how you can easily change your laptop fan speed without using the BIOS in the discussion below.
What Is Desktop/Laptop BIOS?
In simple terms, BIOS stands for the full form “Basic Input/Output System”. This is a component of the PC that can do hardware initialization when you boot the computer.
Even without having an operating system such as Windows 10, Windows 11, Linux, etc, you can easily control your laptop hardware performance from the BIOS mode.
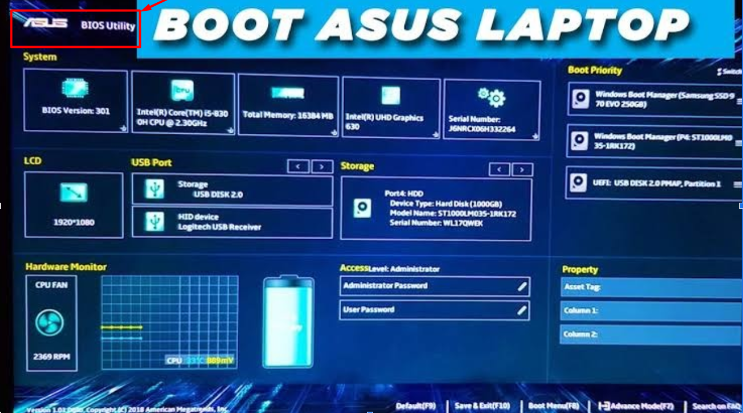
BIOS serves a lot of other purposes as well such as adjusting the CPU fan speed, deciding the boot storage preference, reorganizing the boot menu, facilitating operating system installation, etc.
Not only that, your desktop/laptop BIOS controls the connection of peripheral hardware such as a touchpad, keyboard, USB port, mouse, etc as well.
Simply put, with a BIOS, you can control your desktop/laptop hardware and its functions even without having an operating system.
For example, the gaming laptop Asus TUF F15 15.6″ Gaming Laptop has a very user-friendly BIOS system. In this laptop, you can easily adjust the CPU fan speed or the CPU bus speed from the BIOS (without having an OS installed).
How To Use Third-Party Apps To Control Laptop Fan Speed?
In this tutorial, we’re going to use an app called “SpeedFan” to control the CPU fan speed of your laptop. SpeedFan is a completely free software that you can download without spending any money. To take advantage of this software in controlling your CPU fan speed, all you have to do is download it and follow the below steps:
Downloading And Installation Of SpeedFan
- First off, go ahead and visit the official website of SpeedFan and download the app to your laptop/desktop PC.
- Now, the software app itself is very small in size. So, you should only take a few seconds to download the app to your PC. Once the download is complete, you can go ahead and click on the SpeedFan software app and install it right away.
Firing Up The SpeedFan Software
- Although the SpeedFan app is very capable, its user interface can seem a bit overwhelming for a new PC user. But, not to worry. This app is indeed very effective in its purpose. So, don’t get discouraged if you don’t understand the whole interface right away.
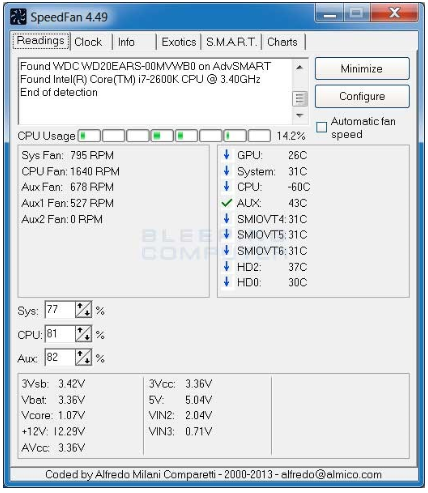
- Now, go to your desktop interface and fire up the SpeedFan software app from there. Once the SpeedFans after the app is opened, it will look somewhat similar to the screenshot we have provided below SpeedFan
Using The Automatic Fan Control Feature

- The most straightforward way of using the SpeedFan software app to control your CPU fan is to open the “Reading” tab and tick the “Automatic Fan Speed” feature under the “Configure” button (shown in the screenshot below).
- Now, once you turn ON the automatic fan speed feature, you can head over to other tabs of the SpeedFan app and monitor the temperature of your CPU and other components such as hard drive GPU, etc.
Setting a Preferred Temperature

- Now, you can tap on the “Configure” button. Then, it will open up a new window with lots of tabs such as “Temperatures”, “Fans”, “Voltages”, “Speeds”, “Fan Control”, etc. In the “Temperatures” tab, you can monitor the temperature of each component and each core of your CPU.
- Here, you can set up your preferred CPU temperature by defining the “Desired” and “Warning” temperature limits. After inputting your preferred temperature in Celsius, you can press the “Okay” button to activate your preferred settings.
Once you set up your preferred temperature for a specific component of your CPU, the SpeedFan software app will automatically control the CPU fan RPM to adjust the CPU temperature.
For example, if you set up your CPU temperature to be a bit high (about 50° c), the SpeedFan app decreases the CPU fan speed to keep the CPU warm (close to the 50° Celsius limit). Or, if you set your preferred temperature to be about 40° c, the SpeedFan app will increase the fan speed to cool down the CPU a bit further.
Now, it’s worth noting that increasing the CPU fan RPM will make the CPU fan generate less noise. On the other hand, if you decrease the preferred temperature, it will increase the CPU fan RPM. Which, in turn, will make more noise.
How To Use An External Fan Controller To Change The CPU Fan Speed Of A Desktop?
In case you own a desktop computer, you don’t need to keep yourself limited to using the SpeedFan app. Rather, you can use an external fan controller device to control the CPU fan RPM of your desktop.
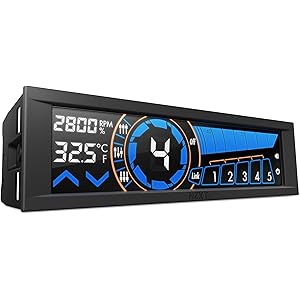
For example, the Corsair iCUE is an ultimate choice in the realm of external fan controllers.
It’s because it comes with a dedicated software (CORSAIR iCUE) which can easily connect with all the components of your desktop CPU and control the fan speed as well. Furthermore, because of the RGB LED light feature, it’s visually pleasing as well.
Now, in order to fully take advantage of an external CPU fan controller, you need to go ahead and check the manufacturer’s instruction page to ensure the exact steps of using the CPU fan controllers.
For your convenience, we have stated a few popular external fan controllers below:
1. NZXT Sentry 3 – Best Overall
 This particular fan controller for desktop PCs is the most basic and straightforward fan controller available on the market. While it packs all the features that an advanced user would want, its pricing is pretty moderate.
You can easily tuck it into your desktop and fit it into the desktop casing. Also, it is compatible with all models of CPUs and motherboards. That’s why it’s a universal fan controller for beginners and advanced users altogether.
2.Electop Fan Controller – Most Connection Ports
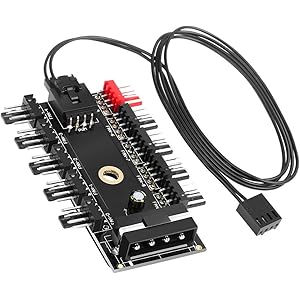 The most noteworthy feature of this fan controller device is that it can support up to 10 desktop fans. For power draw, this device uses a SATA connector that connects to the motherboard.
Not only that, this product has a good reputation for providing a durable lifetime. Namely, if you buy this, you are likely to get up to 5 years of constant performance from this. So, all in all, if you have a very large-sized CPU with a lot of components in it, this is the perfect fan controller for you.
3. Thermaltake Commander FP SATA Powered 10 Port 4-Pin – Best In Budget
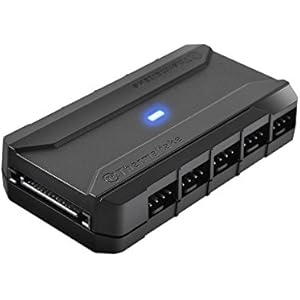 If you want an affordable fan controller that also has the capability to provide premium performance, you should look into the Thermaltake Commander FP. This device also supports up to 10 ports, where you can connect up to 10 CPU fans.
But, you need to be mindful that it doesn’t support the PWM feature. It means it cannot read the CPU temperature on its own and adjust fan speed according to it. That’s why, with this fan controller, you need to manually set the fan speed.
Frequently Asked Questions
How much fan speed is optimum?
In terms of RPM value, we cannot actually tell you how much fan RPM is most optimum for your PC. But, we can surely tell you that keeping your fan RPM at 100% capacity is not healthy at all. It’s because this will render a huge noise generation and the fan will go out of commission very quickly as well.
That’s why we recommend that you keep your fan speed at 70% to 80% capacity. But, when you are gaming or putting a high load of work on your PC, it may need to exhaust an extended amount of heat through the CPU fans. At that time, we recommend that you set the fan speed to 100% for the time being.
Should I turn off the CPU fans?
No, absolutely not. We do not recommend you completely turn off the CPU fans. It’s because, if you turn off the fans, the CPU will be overheated and get permanently damaged.
Furthermore, the microchips inside the CPU and the motherboard can also get melted due to extreme heat. That’s why we do not ever endorse keeping the CPU fan off. Rather, if your CPU is making a lot of noise, you should adjust the fan speed down to 20% to 30%.
What causes the CPU fan to go very loud?
The main cause of your CPU fan going into a very loud mode is most probably physical damage in the fan or dust accumulation. If your CPU fan is somehow damaged, or the blades of the fan are physically bent, it will not be able to provide a seamless silent performance. In that circumstance, you will hear loud noises from your CPU fan.
On top of that, if you do not routinely clean your CPU fans, they might accumulate a lot of dust. As a result, the CPU fans may create a huge level of noise.
The Bottom Line
So, at the very end, how to change CPU fan speed without bios? The answer is, “by using third party software packages”, and in necessary cases, “by using external fan controllers”.
However, before adopting any of these solutions, we recommend that you follow the CPU manufacturer’s website for specific recommendations from the CPU vendors. Sometimes, your laptop or desktop may come with its own software app for adjusting the CPU fan speed. In these circumstances, you can just use the official software app from the CPU manufacturer to control the CPU fan speed.
I am a professional laptop and computer troubleshooter, tech editor who loves to talk about technology and software. My passion is electronics devices. Follow me on social media.
More Posts