
Evan Ruiz
Owner at - Techi ShowI am a professional laptop and computer troubleshooter, tech editor who loves to talk about technology and software. My passion is electronics devices. Follow me...Read more
There may have been some occurrences when you wanted to record the internal audio on your Mac computer. One of the most popular ways to do that is by using a third-party app named Soundflower.
First, you need to download the application on your device. Afterward, go to the System Preference section, pull out the output tab, and click on the Soundflower option. From there, choose either QuickTime or GarageBand as your audio downloader. Whenever you want to record the internal audio, just click on Record.
Knowing how to record internal audio on Mac using Soundflower will make your life easier. However, not every version of Mac OS supports Soundflower. But don’t worry. There are other ways to record your internal audio. We’ll be going through the alternatives as well, just to be safe.
Key Takeaways
- There are no default apps for recording internal audio on Mac.
- You’ll need to use third-party software to create a virtual mic to help record audio.
- There are other ways to record internal audio without third party software (e.g., loopback audio extension)
Is It Possible to Record Audio Internally?
To put it simply, yes, you can record audio internally. What may come as a surprise is that there are countless ways to do that, each with its own features.

Not only on Mac, but you can record internal audio on Windows, Linux, and other operating systems. Here are some popular apps that you use to record audio internally.
QuickTime Player
OS: macOS
Users like the QuickTime player because you don’t have to go through much trouble to set up the app. Plus, it also lets you record your screen with just a tap.
Unfortunately, if you’re not a mac user, you can’t use this fantastic video recording software. In the latest version of macOS, the Mac OS X, the QuickTime player comes bundled with the operating system.
You can play and record both audio and video files with this application. While the option isn’t that extensive, the QuickTime player also has an editing feature. So, if you want, you can edit your audio and video files to some extent.
Audacity
OS: Windows, macOS, Linux
If you’re serious about recording and want to play in the big leagues, we suggest you use Audacity.
However, keep in mind that this open-source program is a lightweight one, so it may not be able to do all the heavy-lifting like other professional-grade editing software. But all in all, it’s a pretty nifty addition to your arsenal.
Moreover, since it’s an open-source program, there’s a massive community behind it that’s very helpful. This community is also striving to make improvements to this editing software.
EaseUS RecExperts
OS: Windows, macOS
If versatility is what you’re gunning for, the EaseUS RecExperts will suit you perfectly. Whatever you want to record on your screen, whether just a part or its entirety, this recording application will help you do that with ease.
You also have the option to choose what audio you want to record. By using the EaseUS RecExperts, you can choose to record your internal and microphone audio simultaneously or separately. So, if you’re looking to know how to record only internal audio on Mac, here’s your answer.
But most of all, this recording software is suitable for both novice and experienced users. Apart from the editing feature, you also have a media player at your disposal. So, if you’re looking for a complete package, the EaseUS RecExperts is your best bet.
If you’re not willing to commit to an application or your project is comparatively small, you can look for some online editing software.
Screen Capture
OS: Any
While Screen Capture is primarily an application for your computer, it also serves as an online platform for recording your video and audio.
However, its functions are limited to recording only. If you want to make some edits to the recorded content, you’ll have to turn to the application. The desktop version is entirely free of charge.
Does Mac Have An Internal Audio Recorder?
There’s a reason why using third-party apps for internal audio recording has become so popular. However surprising it may be, Mac doesn’t have a built-in or default audio recorder. Hence, you can’t record your screen without the help of third-party software.
However, not every third-party application is suitable for internal audio recording on macOS. Thankfully, the latest version of macOS, Mac OS X, includes QuickTime Player as a part of its bundle.
So, if you have the latest version of macOS, you should be able to record your internal audio without downloading any apps. Alternatively, you can look for ways how to record internal audio on Mac Garageband. It’s a pretty simple process.
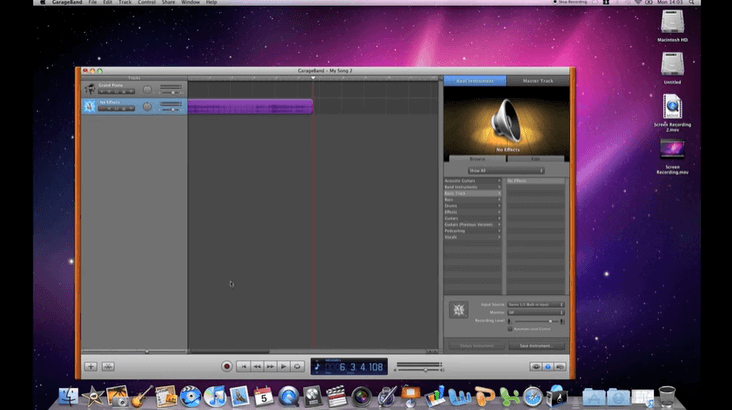
How to Record Internal Audio on Mac Using Garageband?
You can either use a 3.5mil jack to record your audio. Or you can use the built-in microphone to get the job done.
Step 01: Create A Session
First, you need to download the Garageband app. Once downloaded, open the application.
Look for the New Project button on the left side of its interface. Click on it. You’ll be asked to choose a preset. Pick any you like.
You’ll now be directed to the New Project Form Template. Choose your settings for the recorded audio (its tempo, signature, file name, etc.) and click on the Create button to enter the new session that you’ve created.
Step 02: Create Your Track
Once you’re in the new session, check on the bottom-left corner of the app’s interface. You’ll notice a plus (+) sign. Click on it.
You’ll need to select what type of track you want to create. Choose whichever you want and click on the Create button.
Step 03: Update Settings
Go to the Preferences option. Click on the Audio/ MIDI tab. You’ll see two options on the menu: Audio Output and Audio Input. Change both from System Setting to Built-in Output. You’ll be asked to confirm your choice. Press Yes.
Doing so will change your audio driver to the required setting. Close the Preferences section.
Step 04: Start the Recording Session
Pick whichever audio you want to record. You can select any songs from Spotify or the iTunes Store or whichever you prefer. Play the track and minimize the application that was playing it.
Go back to the Garageband interface. You’ll see that the new track is now playing. Click on the red button on the Now Playing track to start the recording session. Customize the recording level to your preference.
Once you’ve recorded the track, click on the red button again. You’ll see the red light go off, which means the recording session has ended. Voila! You’ve recorded your internal audio using Garageband.
How to Record Internal Audio on A Mac Without Soundflower
Generally, macOS doesn’t permit recording internal audio. So, you’d need to create a virtual mic to record any sounds. That’s where third-party apps like Soundflower come in. Soundflower Mac creates this loophole to make recording possible. However, there’s a way around this.

If you don’t want to use any third-party apps to record your audio internally, you can use an extension to get the job done. It’s a pretty straightforward process.
Step 01: Install the Extension
Go to this site and install the loopback audio extension.
Step 02: Open the Media
Open the audio or video file that you want to record. If you’re playing the file on a browser, avoid Safari. You can use Google Chrome or Firefox or whichever you prefer.
Once you’ve opened the media file, roll back the media five seconds before when you want to begin recording. That way, the application’s controls will have enough time to fade away without ruining your recorded file.
Now that you’ve rolled back the file, don’t play the file yet. You need to configure your settings first.
Step 03: Update Your Settings
Get on the System Preferences menu and proceed to the Sound option. Under the Sound option, you’ll see a tab named Output. Click on it. You’ll see an option to choose your sound output. Here, select Audio Loopback.
Make sure to remember what your default choice was.
Step 04: Choose Recording Options
Access QuickTime Player and click on the File tab. A pull-out bar will appear. Click on the New Screen Recording button.
You’ll be asked whether you want to capture a part of your screen or the entirety. Once you choose whichever you want to do, press the Options button.
You’ll see a pull-out bar. Here, select the audio source. You’ll see an option named Loopback Audio; click on it.
Step 05: Start Recording
Go back to the media file you’ve chosen to record. Click on the Play button and wait until the part you want to record.
Step 06: Save the File
Stop the media file and the player application. Look for a black square at the upper corner of your display. It should be right next to the Finder menu.
Click on it, and the recording session will stop. Save your media file wherever you want.
Step 07: Revert Your Settings
Now, you need to change back the settings to the default. Otherwise, you won’t hear any sound from any of the applications.
To do that, navigate to System Preferences> Sound. Remember how we asked you to note down your default choice? That’s going to come into play now. Change your settings to the factory choice.
You can tell the process went smoothly if you can again hear the sounds from your speakers.
Frequently Asked Questions
While the process isn’t that complicated, it’s understandable if you have some questions. To help you figure things out better, we’ve added some of the most frequently asked questions. Hopefully, you’ll find what you’re looking for.
Does QuickTime Record Internal Audio?
Yes, QuickTime Player records internal audio. In fact, it’s one of the best recorder applications available on the market.
Unfortunately, the application is only available on macOS. While you had to download the file separately in the earlier versions, the latest version of macOS includes this application in its bundle.
The QuickTime Player works as a group of applications, files, and plugins. It can play and record both audio and video files. Moreover, it can deliver the recorded files in a synchronized manner!
So, yes, you can record internal audio Mac QuickTime!
What Is Loopback Audio?
Loopback is a very helpful tool available on macOS. Imagine if you had a high-end studio mixing board. That would take your sound editing skills to a whole other level, right? Well, loopback audio does precisely that.
This application allows you to mix the audio from various sources, whether it be applications or audio input devices. Then, it takes the mixed or combined audio and converts it into a file to provide it to the users.
For example, you can mix your voice with any music files from Spotify or the iTunes store and let your friends hear it when you’re on a call.
Conclusion
Whenever you’re using Soundflower, keep in mind the default settings. Without reverting to the default settings, your speakers will have no other value than decorative pieces!
While that’s true, you don’t have to worry about it so much. You shouldn’t have too much trouble since you already know how to record internal audio on MAC using Soundflower. And even if you stumble along the way, you can always count on us.
Just a word of advice before we pull down the curtains, while using Soundflower, the application will channel all the noise your PC makes. That means the notifications too. So, before you start recording, make sure to disable the alerts, and you should be good to go.
I am a professional laptop and computer troubleshooter, tech editor who loves to talk about technology and software. My passion is electronics devices. Follow me on social media.
More Posts