
Evan Ruiz
Owner at - Techi ShowI am a professional laptop and computer troubleshooter, tech editor who loves to talk about technology and software. My passion is electronics devices. Follow me...Read more
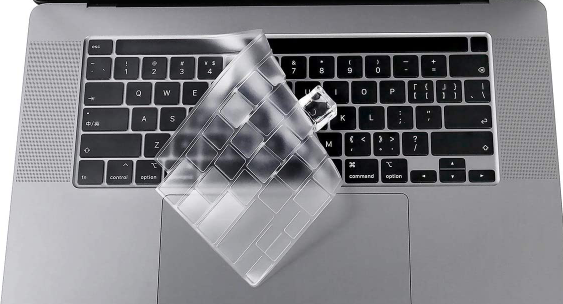
keyboard covers are something you should never ignore. A silicone cover is an affordable option for laptop keyboards to prevent dust and accidental water spills from ruining your device.
So it’s common on high-end systems like MacBook Pro or other devices with expensive materials that could get damaged by such things easily.
Even people using this type of accessory often complain about dirt gathering over time. That can be prevented by simply sticking a piece of silicone onto the keyboard itself no need whatsoever in moving around while typing!
We will briefly discuss some of the importance of a Silicone Keyboard Cover and how to make the cover stick.
Let’s Start reading.
What is Silicone Keyboard Cover Made of?
Silicone Keyboard covers are mainly unique to the model of the keyboard. They consist of transparent, flexible, and waterproof silicone, Thermoplastic Urethane (TPU), or Polyurethane plastic.
These covers are important for preventing crumbs, spills, dust, dirt, and any potentially damaging element from touching the keyboard.
Some of our recommendations include
- Green Onions Supply[3 Pack] Universal Fully Covered Flat Style
- Silicone Keyboard Cover Skin for Newest MacBook Air 13.3 inch A2337 M1
Why Should You Use a Silicone Keyboard Cover?
Some of the reasons to use a silicone keyboard cover include preventing liquid food damage, maintaining the keyboard’s appearance, preventing dirt and dust, etc.
Remember, it protects your computer keyboard, protects its luster, and makes it more durable. Therefore you should consider using a silicone keyboard cover.
Let’s look at a few reasons you should use a silicone cover on your keyboard.
Prevents Food and Liquid
The silicone keyboard cover protects your computer from all kinds of liquid spillages because silicone is waterproof. Suppose you have a drink or water around your computer, and it mistakenly spills on the keyboard.
In that case, you can be sure it won’t damage your computer keyboard. Also, the silicone keyboard cover is very easy to clean. You can clean it using regular water and a cloth.
This video provides more detailed proof of what we’re discussing about
Keeps the Keyboard New
The silicone keyboard cover keeps your laptop keyboard new, protecting its luster. As time goes by and frequent typing, the letters and numbers printed on the keyboard fade away.
Making the laptop keyboard look outdated and old, whereas if the keys are still visible, they make the laptop look fresh and in shape.
Prevents Dirt and Dust
Another reason you need a silicone keyboard cover is that it protects your keyboards from dirt, crumbs, and dust. This is essential because many people are allergic to dust, and some others are very particular about good hygiene.
So, the silicone keyboard cover is an efficient solution for this set of individuals.
How To Make A Silicone Keyboard Cover?
Before we move on to discover How to Make a Silicone Keyboard Cover Stick, let’s consider how to make a silicone keyboard cover yourself. Follow the steps below to find out how.

Get Your Required Tools
The first thing you need to do to custom-create your silicone keyboard cover is to gather your required materials. You will need
- Pen
- Tape measure
- Liquid silicone
Get the Measurement of Your Keyboard
Now you have all the equipment you need, and then you need to know the dimensions for your computer keyboard cover mold. These dimensions are essential for creating the mold for your silicone keyboard cover.
Measure the dimensions of your keyboard’s length, depth, and width. After that, you can use the measurements to create the keyboard cover’s mold.
Of course, you have to ensure that the dimensions are correct, so you don’t make any mistakes in creating the mold.
Create a Mold for Your Keyboard
After getting your measurements right for creating the mold, it’s time to make the mold. There are various ways to create your keyboard mold.
The first is to form the mold using a material that hardens like clay. Place the keyboard on the clay to shape the mold.
Alternatively, you can use a large bowl to create the mold inside it using barriers if you don’t have clay.
Prepare Your Mixture
Once finished creating the mold, it’s time to make the silicone mixture. You need to ensure to mix the component correctly. However, if you don’t have a bottle of liquid silicone at home, then you can order online.
The majority of liquid silicones are available in ready-to-use forms. However, some can come with a few component packets to mix. Before mixing the silicone mixture, read and follow all the instructions properly. Use a wooden stick, spoon, or any solid object to mix the substances well, ensuring not to make any air bubbles while mixing your silicone mixture.
Fill Up the Mold with the Mixture
After successfully mixing, it’s time for you to pour the silicone mixture into the mold. Whilst doing so, be careful when pouring the mixture. You want to fill up every space in the mould with the silicone mixture.
Then, spread evenly around the mold. It is essential because if you don’t spread the silicone mixture properly, you might mess up the final result.
When you have finished filling the mold, cover the mold using a flat substance and allow a minimum of 10 hours to dry completely.
Remove the Keyboard Cover
When the silicone mixture has completely dried, you need to remove the cover carefully. Use scissors to cut the rough edges to give the keyboard cover a better finish. You can now go ahead with the next step.
Clean up the Silicone Keyboard Cover
If you want your silicone keyboard cover to have a shiny, clean, and transparent look, cleaning is vital. You can clean the keyboard using a microfiber cloth or polishing spray and dampen it with some water. When you do this, the surface of your keyboard will become shiny and polished.
You can now use your Silicone Keyboard Cover
Now you have created and cleaned up your self-made customized silicone keyboard cover, place it over your laptop keyboard, and it’s ready to use. You will soon realize that using a silicone keyboard cover will provide you with a better look and feel for your keyboard.
If you’ve been using your computer silicone keyboard cover for a while, you may notice that it doesn’t stick to the laptop keyboard. How can we solve this issue? Check out this video below to get more details:
How to Make Silicone Keyboard Cover Stick?
One of the things that can make your experience with the silicone cover seamless and stress-free is when it sticks to your keyboard. However, it’s not always like that; silicone keyboard covers don’t come with accessories to help with this.
So, what are the alternatives to make your silicone keyboard cover stick to the keyboard? Let’s look at them below.
1. Clean the Keycaps
Your silicone keyboard cover doesn’t stick because of excessive dirt particles on the keycaps, so keep your keyboard completely clean.
Using a microfiber cloth, thoroughly clean the keyboard’s surface. When you’re done doing that, ensure to wash your hands. If not, you can dirty the keycaps again.
2. Use Adhesives
Another effective way to ensure that the keyboard cover sticks to your laptop are by applying adhesive glue. Ensure that every area has stuck to the cover when applying the glue.
Once completed, use a flat surface material, such as cardboard or other hard material, to place over the cover for a while whilst it hardens.
3. Apply double-sided tapes
Using double-sided tape is another very effective means of sticking your keyboard cover to your laptop keyboard.
But sometimes, the double-sided tape can leave some residue on your computer, although it can be easily cleaned off.
4. Use Magnetic Strips
Magnetic strips are also efficient for helping your silicone keyboard cover stick to your computer keyboard. Use flexible magnetic strips and place them around the silicone keyboard cover and the keyboard.
You can apply some Loctite glue to reinforce the tapes permanently to the cover when you are done. Also, note that because it’s magnetic, then it’d be much easier to remove.
5. Use Scotch Tape
Scotch tape is another useful means for ensuring that the silicone keyboard cover sticks to the keyboard.
The scotch tape is the most effective if you don’t want any residue on your laptop keyboard.
How To Clean A Silicone Keyboard Cover?
Step 1: Prepare the Materials
Fill a bowl with warm water. Then, add a quarter teaspoon measure of mild detergent powder to the water and mix it. Take off the silicone cover from the laptop keyboard and clean the dust and grime using a cloth.
Step 2: Wash the keyboard cover
Next, place the keyboard cover in lukewarm water, ensuring that the water isn’t too hot, as that can damage its texture. Leave the cover in the water for a minimum of 10 minutes. After that, carefully clean the silicone cover with warm water.
Step 3: Dry the Cover
After washing the cover, clean it with a towel to remove all water drops. Then, check the cover thoroughly for any drops of water or dirt. If it is clean and dry, you can replace it on the keyboard again.
Check out this link below to understand better
Frequently Asked Questions
Why won’t silicone keyboard covers don’t stick?
There are two reasons why silicone covers won’t stick. The first reason is that you’re not applying sufficient force on the keyboard; you’re using your fingers rather than your palm.
Then secondly, there’s excessive space between your keyboard and the silicone keyboard cover.
Do Silicone Keyboards Work?
Silicone keyboard covers protect your computer keyboards from dirt, dust, liquid spills, etc. In addition, they do not interfere with your keyboard function.
As they only provide an outer protective layer, you shouldn’t have any issues with the actual keyboard itself.
Why does my MacBook keyboard cover not stick?
Sometimes, your MacBook keyboard cover may not stick due to physical obstructions by tiny objects like crumbs between the keys or incorrectly placing the keyboard cover on the Macbook keyboard.
Conclusion
This guide discussed How to Make a Silicone Keyboard Cover Stick. To do so, use double-sided tape, adhesive, scotch tape, or magnetic tape. Be aware that the silicone keyboard cover will not stick if there is the presence of dust or excessive space between the keyboard and the cover.
I am a professional laptop and computer troubleshooter, tech editor who loves to talk about technology and software. My passion is electronics devices. Follow me on social media.
More Posts